Technologies in all spheres of human activity are rapidly developing, progress has not bypassed agriculture. A new agricultural technician is being designed, new methods of planting a particular culture are being created, with each new day becoming more and more. But even in such conditions, many gardeners differ in their conservative attitude to everything. You can take as an example even the process of hilling potatoes, the above-mentioned gardeners spend it with hoppers, which makes the process more difficult and energy-consuming. What can replace the "loved" hoe? There are many variants of answers to this question, but the best one is a manual hiller.
Hiller - a versatile tool that any gardener may need, hilling will be much more effective with him. Using this tool saves you time and effort.
Table of contents
Types of Hillers
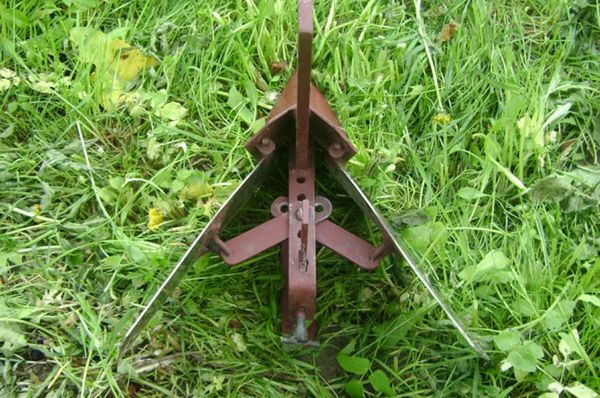
Manual
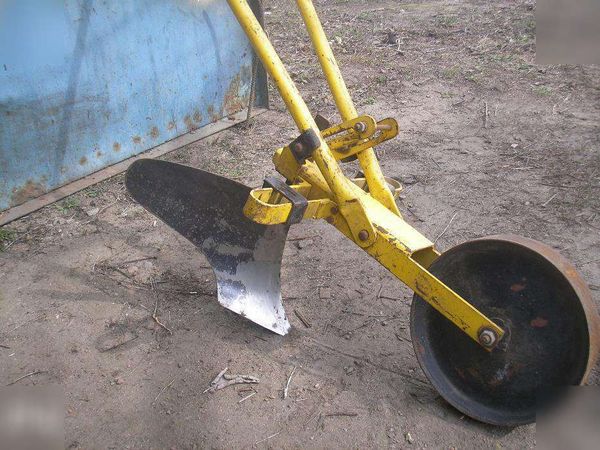
Manual okuchnik (disk) are intended for loosening and hilling. The use of such a tool can guarantee high-quality tillage.
This tool can help the horticulturist to hardening, will avoid energy-intensive and tedious work.
To tractor
They are used for automated processing.The device is able to immediately remove the weeds from the cultivated area and, in fact, successfully hilling the tubers. After the manipulation of the tractor hiller potato yield level increases dramatically.
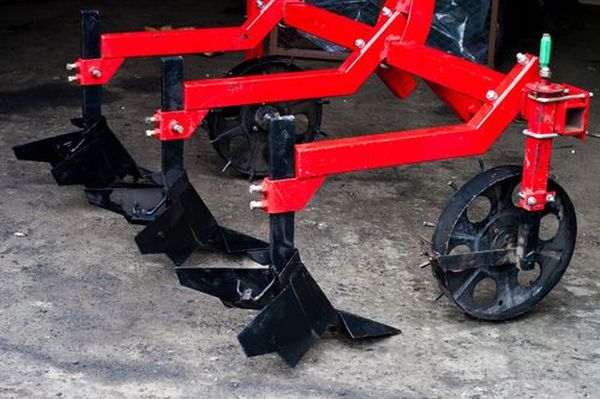
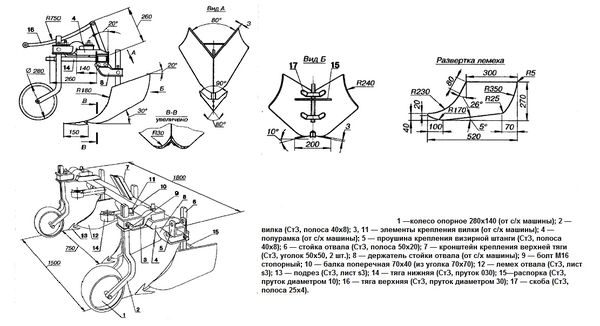
They consist of: a metal frame, a hinged device, which is responsible for the hitch, two forged wheels, iron pointed legs and heaps.
The load on the hiller is reduced by tractor wheels, in turn, the legs cut the ground (up to fifteen centimeters). Steel support attaches the paws to the frame. For hilling used lattice dumps.
Basically, the tractor can be attached exclusively to the tractor T-25, which has a rather small traction force, in contrast to the MTW. He is not able to work with the device, which has more than 3 buildings.
If the gardener has a goal - just to pile up the potatoes, then you need unscrew lancet paws.
To walker
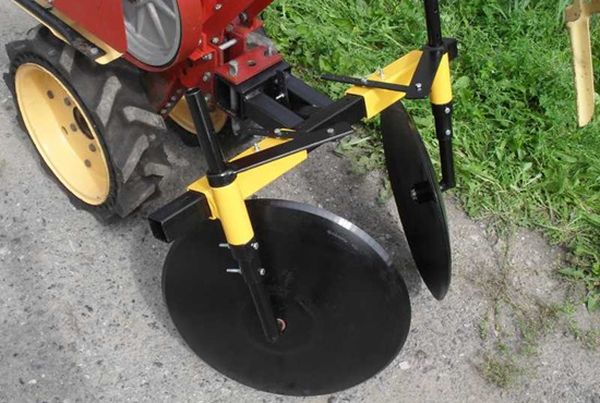
On the tiller unit is installed in place of the opener.
How it works: during the transitions between the rows, the device sprinkles the ground with its wings right ontubers. It is possible to attach a disk okuchnik to the motor-block.
In fact, "Okuchnik to motoblock" - this is not a separate species. We used this to let you know that the device can also be installed on a motor-cultivator.
Plow
The potato spud plow is designed to facilitate the work associated with growing potatoes. With the help of such a plow, furrows and beds are cut, the soil is loosened, crops are planted, and spuds are planted.
According to its configuration and mechanism of action, the plow similar to a disk hiller. At least, their mechanism of action is absolutely identical.
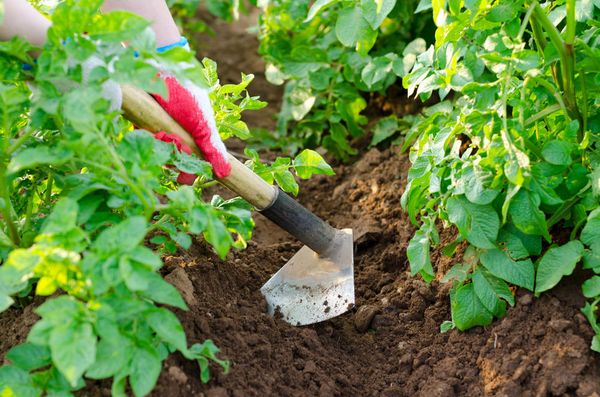
Hilling potatoes
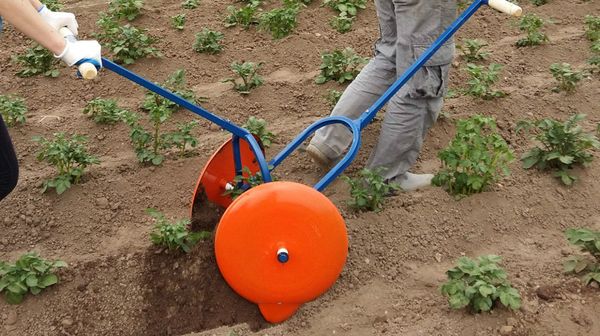
How to use a disc spud potatoes
The mechanism of action of manual hillers is quite primitive. Two gardeners should take up the device from two sides (front and rear). One rests against the handle of the front thrust and sets the rocker in motion, other - presses the discs into the ground, pushing the rear thrust handle.
The disk passes through the soil, leaving behind a noticeable train. With the help of such a device you can pile up plants that are in close proximity to each other.But you can also adjust the distance between the discs, just install a few additional details.
What is needed
If you are reading this article, you definitely know that you need potatoes. spud. But why?
Now we will explain everything in detail:
- When loosening the soil, air enters the roots, thanks to which they grow much faster.
- Again, when air enters the roots, potato tubers quickly form.
- If you spud potatoes, you can increase yield by 20-30%
You also need to follow some rules:
- Loosen need timely
- Loosen need for cloudy weather. The best option - after rain, watering or morning dew
- You can not hilling potatoes during the heat, because the plant can simply burn
As a rule, hoes, hoes and rakes are used, their use is energy-consuming and long-lasting. Against the background of Okuchnik, the above tools simply fade away.
Pros and cons of homemade devices
The list of advantages of homemade devices can be counted:
- accessibility - so how can anyone make such a hiller
- free of charge - cases when the person paid to himself is not registered
- efficiency - as a rule, home-made devices are in no way inferior to market analogues, but this depends on the design
- raising self-esteem - it's better to spud potatoes in a good mood
But the cons can be counted:
- safety of work - but it depends on how well the excavator is designed
- quality - again, depends on how well the excavator is designed

Tool facts
What materials are needed
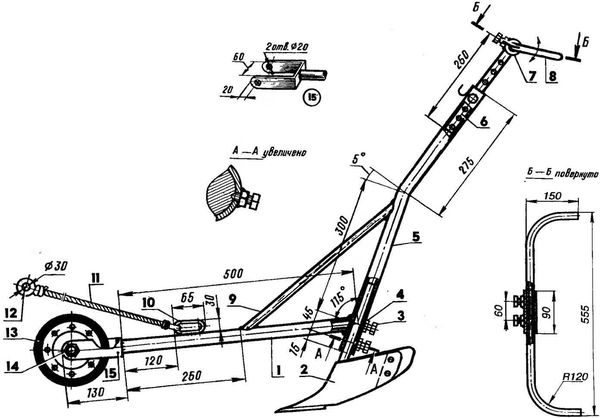
To create your own hiller needed:
- water pipe - it serves as a stand (Diameter - 1 inch, length - meter)
- 0.37 inch tube - it is necessary for the front and rear rods
- steel sheet (thickness - 2 mm.) - dumps will be made of it
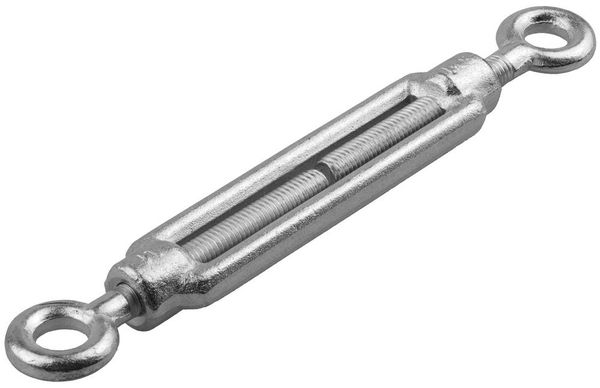
- lanyard - which will secure the front thrust and strut
You also need to have with you: any tools for bending the pipes and a blowtorch (you can use a regular gas burner). She needs to heat the metal parts in the places of their bend. Still need a device for welding and grinder.
Where can I find drawings
On the Internet there are answers to all questions, even to such. Drawings for the manufacture of manual okuchnik can be found online, or in any magazines on the subject of Garden / Garden.
-
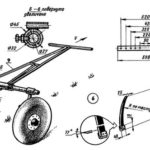
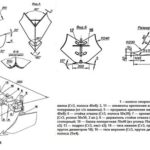
- Disk hiller drawing
-
- Drawing Hiller for tractor
-
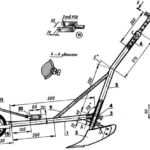
- Hiller drawing
Installation of a self-made okuchnik on the motor-block
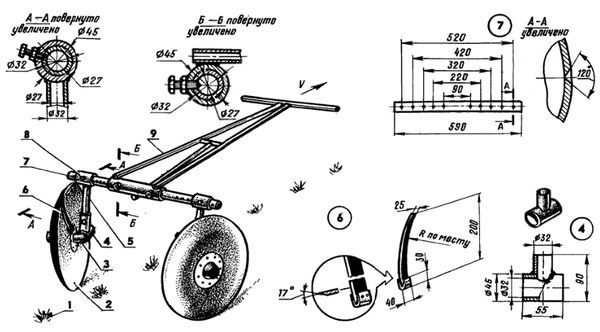
To install a homemade plowing on a walk-behind tractor, you will need bracket. A homemade leash is attached to the bracket by means of a stopper and bolts to flat washers. The stopper is sent inside the tube in the form of a square and securely pressed against its outer surface.
Okuchnik to the motor-block with the hands
Vertical stand
You can adjust the height by means of the telescopic apparatus of the central part. In the tube you want to insert into the tube, which is smaller in cross section than the other, it goes into the rear rod. If you use this method, you can easily adjust the hiller to the level of growth gardener.
Adjustment
Tool bed must be mobile. To fulfill this condition, the front link is attached to the main post by a hinge, adjustment is performed using a turnbuckle, which allows you to change the angle of inclination. In the case when there is no lanyard, a metal plate is used, it is fixed in the desired position and bolted.
Welding
Rear rack and dumps need to be welded to the rack, then the front link is attached. Rear traction width - 0.5 meter. Handles - 0.2 meters. A 0.3-meter-long pipe is welded to the center of the fork, with this end the structure is inserted into the cavity of the vertical thrust.
To adjust the height of the rack you need to drill openings that are at its upper end. Exactly the same manipulations must be done with a vertical fork. The anterior and the posterior should have an identical width.
Making a two-tail plow
To make a two-tail plow, you need plates, each two millimeters thick. They need to give a semicircular bends. Then the process of welding the two halves to the rack.
Two important aspects of work: the seam in the place where the parts meet, must be smooth, the plates must be polished with the help of the grinder.
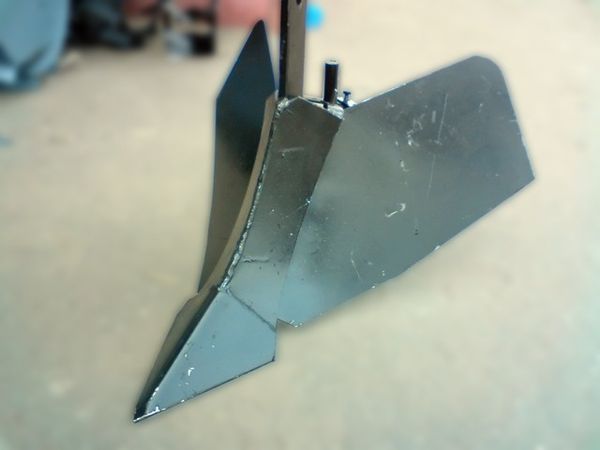
Making a pruning knife
Then you should cut the knife, which by its shape should look like an arrowhead, and carefully sharpen it (the angle between the surface and the knife should be 45 degrees)
Why exactly 45? If you grind a knife at such an angle, it will not lose its sharpness for a long time. Next, you need to weld the trimming knife to the bottom of the rack and grind.
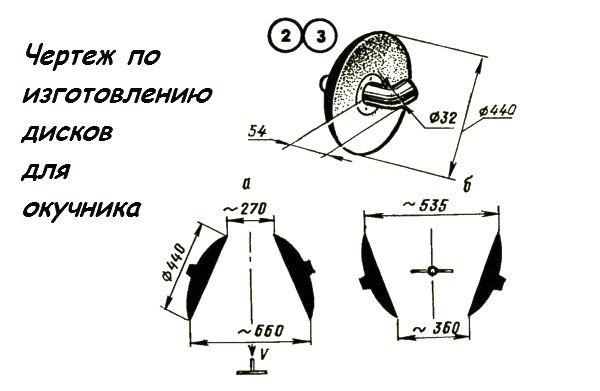
Discs
First you need to cut 2 plates of steel sheet, then you should give them the shape of a semicircle. Both disks are fixed on the rack. Welded the seam must be smooth.
Beforehand, all parts that are to be welded should be sanded with a grinder, and the discs should be carefully sharpened. The pruning part assumes almost all the resistance of the soil.
Okuchnik is almost an indispensable tool that every gardener respecting his time and strength must have.
As for garden tools, hillers - quite expensive, which is really able to help in the economy. In any case, even this expensive equipment can be made with your own hands, it suffices to be able to use the tools and use the drawings.