Incubation of duck eggs at home is a very often used method of hatching poultry on farms and private farms. This method is associated with the reluctance of adult ducks to hatch eggs, and it also applies when a large number of ducklings need to be bred.
In this article we will look at the incubation of musk duck eggs at home, talk about the period of incubation of duck eggs, find out how many days ducklings hatch in an incubator, and also what modes are necessary for this.
Table of contents
- How to choose duck eggs for incubation at home
- Factors that affect the good output of ducklings
- Egg laying and temperature
- Differences between incubation and breeding in an incubator: how many chicks hatch
- Modes of incubation with periods
- Table with terms and humidity during duck incubation
- Whom it is correct to deduce: idoutea or musk ducks
- Indo-Stock Incubation Table and Temperature
- Mistakes in breeding ducklings in an incubator
- Conclusion
How to choose duck eggs for incubation at home
Eggs of different birds have differences in appearance, which include:
- volume;
- the appearance of the shell.
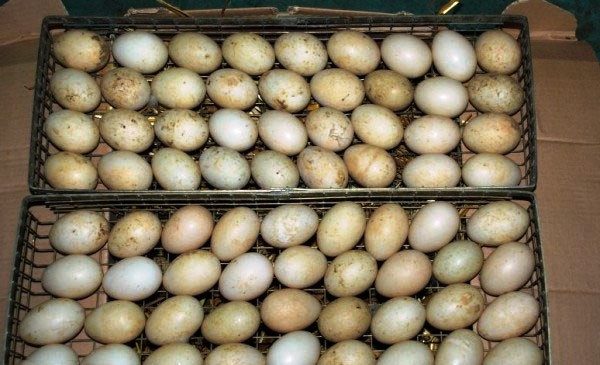
Duck eggs are larger, have a porous, thick shells of greenish color. Before eggs enter the incubator, they must be carefully studied and selected according to the following principle:
- Duck egg must have weight from 75 to 95 grams;
- It should not be strongly elongated, round or not standard form;
- Eggs are chosen with thick, smooth and clean surface;
- The shell should not have no external defects, in the form of chips, deformations, cracks;
- To keep eggs for incubator can not be more than seven days, so shelf life is best kept to a minimum.
Eggs that are prepared for breeding ducklings, it is absolutely not recommended to keep in the refrigerator. The best container in this case, these are special trays of plywood, which are located in a cool place,where the air temperature should not be above +12 ° with good ventilation, the humidity should be about 70%.
Eggs on the tray laid blunt end down, and it is not necessary to impose them on each other, it can affect the number of chicks raised. Before they enter the incubator, they are periodically turned over.
Factors that affect the good output of ducklings
To get the maximum number of poultry, you should pay attention to the following factors when breeding:
- carefully selected eggs;
- correct incubator;
- observance of all incubation rules;
- ventilation;
- incubator temperature for duck eggs;
- compliance with temperature and humidity.
Egg laying and temperature
Eggs before laying the spike ducks should be carefully checked again, carefully remove all contamination. When you bookmark it is necessary to follow these rules:
- Incubator stands pre-install and warm up to set temperature.
- In the lower part of the apparatus is placed a tray with water, for which it is necessary to follow very carefully.
We strongly recommend not to wash eggs before laying!
- The first thing is to place larger specimens and with an interval of four hours medium and small.
- The position of the eggs should be horizontal, ducklings in this position are much better bred, however, they occupy more places.
- The first seven days the temperature should be + 38 degreesthen it should be reduced to + 37.6.
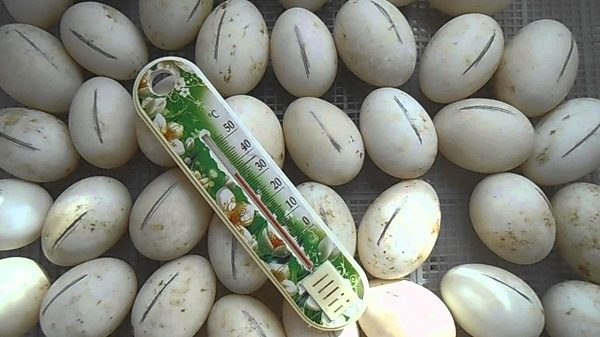
- Humidity is measured by a special thermometer, which can be done independently. To do this, take the usual thermometer and tied a rag on its lower tip, the free tip that remained is dipped in a tray with water. It will show the humidity.
- First seven days humidity should be around 30 degreesthen its indicators are adjusted to 27 ° C.
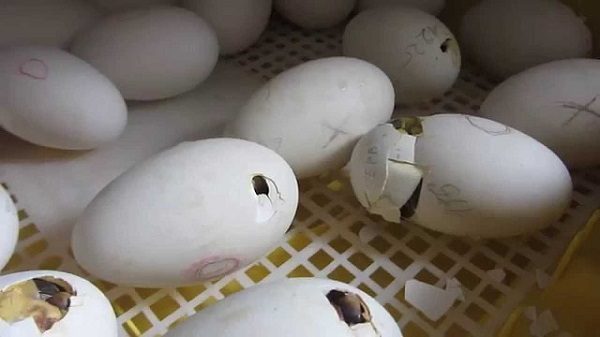
Turning eggs throughout the entire incubation process is very important. It would be just great if the incubator does this automatically. But if there is no such function, then you have to turn the eggs yourself 6 times a day.
To improve the metabolic processes and to develop the chick more effectively, apply the cooling process. Cooling should be soft and not long. Most often it is recommended to simply spray eggs with water, the temperature of which should be about + 27 ° C. The procedure is carried out for about two minutes, then ten minutes are allowed to dry.
Differences between incubation and breeding in an incubator: how many chicks hatch
If there is an opportunity to incubate ducklings with the help of a hen, then it is better to use it, since this process has many positive aspects:
- ducks are very good hens;
- the bird irrigates the water irrigation process much better and more correctly than man;
- hatchability can go up to 100%, while the incubator gives about 70% positive results.
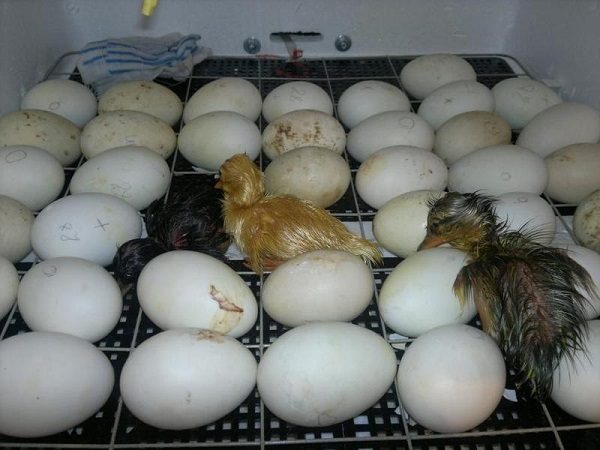
The incubation period in ducks lasts up to thirty days. It is worth remembering that when the hatching is done with the help of a hen, the chicks can appear with a difference up to a day. Therefore, hatched and completely dried ducklings are taken away from the mother for some time, until all the babies hatch. This will guarantee that the duck feeds to the last.
Interesting breeds for breeding are:
The number of eggs that are placed under the bird is much smaller than it can be placed in an incubator. On average, a duck can sit up to twenty eggs at a time, it all depends on the size of the bird. In the incubator, it all depends on the tray.as it comes in, so much and correctly.
Modes of incubation with periods
The mode of incubation of eggs indoutok are special conditions for the breeding of healthy offspring. This period is divided into several stages:
- In the initial period it is very important that the water level and increased heat be maintained.
- In the middle of the outlet, the temperature and humidity are lower and the air flow is increased.
- Closer to the appearance of ducklings, it is necessary to lower the temperature, but the humidity should be increased. Air access is maximized.
Temperature control is very important during all periods of incubation. Cooling helps to make the development of the fetus much more efficient.It is also worth considering the following nuances, if at the beginning, high temperature is permissible, then at subsequent stages, it can be dangerous for the embryo.
Table with terms and humidity during duck incubation
|
Timing
|
Temperature |
Humidity |
Turning over |
Cooling |
Spraying |
|
1 – 12
|
+ 38 ° C |
70 % |
every 4 hours |
on the 6th day |
1 – 2 |
|
13 – 24
|
+ 37.4 ° C |
60 % |
every 4 hours |
2 times a day for 20 minutes |
2 |
|
25 – 28
|
+ 37 ° C |
85 % |
from day 26 stop |
from the 27th day stops |
3 – 4 |
Whom it is correct to deduce: idoutea or musk ducks
Indeootki is a special breed of ducks, which is distinguished by high quality meat. Also this type of ducks is bred to get a delicious liver. Muscovy ducks are quite unpretentious and for them it is not necessary to take care of the presence of a reservoir.
The eggs in the incubator are loaded after thoroughly checking horizontally. The first two weeks recommend to observe the temperature of + 38 degrees, the humidity should be at least 55% and not more than 65%. Egg flipping is done three times a day. On the 16th day begins the irrigation of eggs, with the help of water, which has a temperature of + 37 ° C.After that, the eggs are cooled for about half an hour.
Before you load the eggs into the incubator, you can mark them from two sides in order to follow the coup.
Indo-Stock Incubation Table and Temperature
Below we suggest to get acquainted with the table of temperature regime for incubation of indoutok eggs.
|
Timing
|
Temperature |
Humidity
|
Coup |
Cooling |
Spraying |
|
1 – 16
|
+ 38 ° C |
70 % |
every 4 hours |
start from the 10th day |
1 |
|
17 – 29
|
+ 37.5 ° C |
60 % |
every 4 hours |
2 times a day for 20 minutes |
2 – 3 |
|
30 – 34
|
+ 37 ° C
|
85 % |
not applicable |
not applicable |
3 — 4 |
Mistakes in breeding ducklings in an incubator
Newbies in breeding birds often due to inexperience make the following mistakes:
- Do not provide the correct heatingwhich should be as uniform as possible. In order to avoid this error, it is necessary to apply egg mixing before cooling. That is, from the edges of the egg is transferred to the middle, and from the middle, respectively, spread on the edges.
- Overheat. Care must be taken to ensure that embryos do not receive heatstroke, which can lead to a fatal outcome, which has not yet been born to a chick.
After the chicks hatched, they must be placed in a special container, which is provided with ventilation. Room temperaturewhere this box is located should be within + 24 ° C. A chick who is healthy should weigh about 70 grams.
Conclusion
Experience is the best teacher, therefore, the more often a person breeds ducklings, the better and more effective he gets it. And although the poultry industry in our country is not yet developed. Over time, the situation will change markedly.
Of course, breeding ducklings in an incubator at home is a painstaking business. But at observance of all stages does not cause any difficulties. Over time, the novice poultry farmer will have his own secrets and he will learn to take into account even the slightest nuances. In the meantime, you should follow all the tips and gain experience.
After reading the article, only now I realized what a time-consuming process of incubating duck eggs at home. I was born a question, seeing in the article different names and types of ducks. Still, the most delicious duck eggs come from what kind? And also from what kind most beneficial to our health?
Olga, the taste and quality of eggs depends not on the type of ducks, but on the feed. To eggs were tasty, you need to properly feed the ducks. You can read our article on this topic: https://myfarm.desigusxpro.com/en/pticu/utki/chem-kormit-utyat.html
Olga, you read an article in which half is not the truth, where the author measures the humidity in degrees, God, just do not meet any nonsense on the Internet. Not an article, but complete nonsense ...
Kiril is a wet thermometer and every 4 hours when turning it over, moisturize the cotton wool that is under the cap. Author = forgot = probably indicate this. And the temperature difference (dry - wet) is the humidity. In general, this is called the PSYHOMETER scale and its humidity is determined by it. Well, for stupid - 35 degrees and no problem!